Friday, May 28, 2010

Anything but Cards

I really struggle with coming up with ideas for the quarter auction. This time around I had some help from my friend, Ruth, and other ideas from the other auction ladies. Only time will tell what the appeal of these items are. Let me know what you think. I'm posting photos of the item and a second photo of how I will present it.

Recipe holder includes pot holder & towels. Add some of your favorite recipes for a wedding shower gift.


Coupon folder gift set includes a calculator, pen & scissors.


Snack jars filled with yummy treats.

Wednesday, May 26, 2010

Getting the Most from your Stamp Pad


I taught a class designed to show my students just how versatile our old friend "stamp pad" can be. These are some of the cards they made.

It's so much fun to stretch my creative muscles looking for (or recalling) the very many ways we can add color and depth to our cards with nothing more than the stamp pads we use.

And what I love most about teaching was seeing the reactions and delighted expressions of my students as they discovered these "new" ideas for themselves. It really is the reward at the end of the rainbow.

This first card was done by cutting a reverse stencil of the flower stamp on scrap paper. We tossed out the flower and used the hole, placing it over the stamped flower. Then we sponged color from our stamp pad onto the flower. The layers and subtlety of shading are one of the great benefits of this technique.

Did I say we tossed out the flowers we cut out? Oops! I did encourage my students to use them inside their cards to continue the theme. So pretty!

This card was probably the class favorite. There was a lot to putting it all together, but we learned so much on this card! Too much detail to relate here, but I hope we all learned about thinking outside the box.

I designed this card after I had the parts. My friend, Mary Jane, let me borrow her Cuttlebug and I whipped out the textured pieces to take home and play with. The results were so quick and easy and I think the look is fabulous! Some students were dismayed that the pad left color in areas other than the embossed lines. But then they looked back at my sample and saw that it looked burnished with color- very cool.

Something I don't have a sample of to show you is using the same technique on the back of the embossed piece. Try it sometime.
We did one more card using the water brush with our stamp pads. It's like having a perfectly matching marker. Perhaps I'll post that one tomorrow. Stay tuned!

Tuesday, May 25, 2010

Happiness is a Beautiful Card


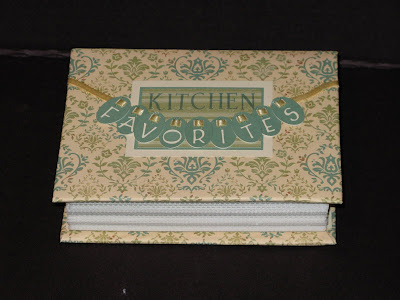
This is one of my favorite cards. I love the tri-fold pattern which makes the card even more beautiful when it is opened, as well as these beautiful Close to my Heart papers, Creative Basics, Veranda Collection.


Most of the CTMH paper packets include several sheets and colors of solid card stock as well as 6 different designs of patterned paper - 2 of each double sided design. It's a wonderful value.


But... the Creative Basics collection introduced with each catalog? Only 2 double sided designs, six sheets of each, and 4 yards of coordinating ribbon. Perfect for card makers like me, it means more sheets of the designs I love!!


Here is the opened card. Isn't it gorgeous? I find these colors and patterns so beautiful, I don't think I could go wrong with them.

I first saw the pattern for this tri-fold shutter card when a friend posted a photo of her card using this pattern. I played around with some paper until I figured out the cuts and folds and used it for my Christmas Card (2009). Recently I had the opportunity to share the pattern with a stamp club I am a member of. It was so fun to see what everyone did with the same basic start. I'll be teaching this exact card this week in my Yoga Class. I am so excited!


This final view is the flower detail. I sponged the white paper flowers in the same colors of the papers (Juniper & Garden Green). I was a little stuck on what to do for the center of the flower because I was not at home - away from collections of stampin' & scrappin' do-dads. So I took a thin strip of solid Juniper card stock and wound it around a embossing stylus to make a tight swirl. I attached it to the center of the flower with Liquid Glass. I love how necessity stimulates creativeness!

Monday, May 24, 2010

Flutter by, Butterfly!

It's been a while since I've posted any of my work - didja miss me?

I guess I have to admit to being lazy. Why? Because I have been crafting, but not posting. Shameful!! Because I have issues with blogspot & photos I am not going to try to post everything at once. But do come back often because I have "stuff" to share!!

Tonight I'm sharing a card I put together for a class. I knew I wanted to use this explosion technique and that became my starting point. The rest of it stressed me. My final card was not the first attempt. I started with computer paper and thought I had it all worked out. Surprise... even then I had to rip it apart and rearrange. Hope you like the final results!
This is with the explosion open. Inside is a dandelion "puff" and the words "Make a Wish." It's all mounted on a regular size card base. Although it would be just fine post-card style, the card gives the sender plenty of room to write a note.